Создаем невероятную простую систему регистрации на PHP и MySQL. PHP сценарии обработки HTML форм Отступление registration form php
I am glad to post here my knowledge and techniques used in PHP and MySQL. As you all aware that PHP and MySQL are the most widely used Open Source for websites. Today’s millions of websites and applications are using these free software’s. Personally I feel that this could be next level for front end developers by using PHP and MySQL a HTML developer can make a website more dynamic. Let us discuss How to create a Basic registration form in PHP with database, Its simple and very useful for a basic website dynamic user dynamic registration. Every creative can implement its basic structure to their website. Now Just follow these simple steps and you will find that your first dynamic functional registration form with database entry on every form fill up.
STEP 1: Create Database for inserting values
Go to MySQL, Create database student; Qurey OK, 1 row affected (0.00 sec) mysql> use student Database changed mysql> create table student(id int,name varchar(40),email varchar(80),password varchar(40)); Query OK, 0 rows affected (0.05 sec)STEP 2: Front end code, Make HTML Structure of your registration form
Make a new file registration.html we will make it in PHP later, the structure would be:STEP 3: For Database connectivity using MySQL
Create a connect.php file for basic database connection use that default code as belowSTEP 4: Finally create a registration.php page to get value of all fields shown in HTML page
Here a Front end developer can write some own code in PHP, Read the code and understand this basic structure line by line you will find it very easy.Conclusion
By following step by step procedure provided above a basic registration form can be created. So best of luck for your first PHP code Get the codeLaravel requires Composer to manage the project dependencies. So before installing Laravel, make sure you have Composer installed on your system. In case you are hearing about Composer for the first time, it"s a dependency management tool for php similar to node"s npm.
To install Composer on your machine, check this post:
Installing Laravel on Windows:
Follow the below steps to install laravel on windows machine. No matter you have xampp/wamp stack, it works for both. On WAMP, make sure to install laravel on "www" folder and on XAMPP, obviously the "htdocs".
STEP-1) Open "htdocs" folder on XAMPP, hold SHIFT key and right click on the folder, and choose "open command window here". Alternatively, you can open command window and change directory to "xampp/htdocs".
STEP-2) Enter the following command.
Composer create-project laravel/laravel my_laravel_site --prefer-dist
Here "my_laravel_site" is the folder name where laravel files will be installed. Change this to your liking.
STEP-3) Now it"s time to be patient as laravel installation is going to take some time.
STEP-4) Once installed, change directory to "my_laravel_site" (cd "my_laravel_site") on the command prompt and enter the below command.
Php artisan serve
STEP-5) This will show a message something like, "Laravel development server started:" along with an url.
STEP-6) Copy and paste the url on the browser. If things go right, you"d see the laravel welcome screen.

STEP-7) Done! You have successfully installed laravel on windows machine and ready to go with.
Setting Application Key:
Laravel requires little configuration after installation. It requires you to set the application key. This is a random string of 32 characters long used for encrypting session and other sensitive data. Usually this will be set automatically when you install laravel via composer or laravel installer.
In case it"s not set, you have to do it manually. First make sure to rename the ".env.example" file to ".env" on your application root. Then open command prompt and change to the laravel project folder. Now run the below command to generate the key.
Php artisan key:generate
Copy this generated key to the APP_KEY variable on ".env" file. Save and you are done.
Installing Specific Laravel Version:
The above given method will make composer to download and install the latest version of laravel. If you want to install earlier versions of laravel on your machine, make sure to include the respective version number on create-project command.
Composer create-project laravel/laravel=5.4 your-project-name --prefer-dist Read Also:
Likewise you can easily install laravel using composer on windows . I hope you find this tutorial useful. Please share it on your social circle if you like it.
Over the past few years, web hosting has undergone a dramatic change. Web hosting services have changed the way websites perform. There are several kinds of services but today we will talk about the options that are available for reseller hosting providers. They are Linux Reseller Hosting and Windows Reseller Hosting. Before we understand the fundamental differences between the two, let’s find out what is reseller hosting.
Reseller Hosting
In simple terms, reseller hosting is a form of web hosting where an account owner can use his dedicated hard drive space and allotted bandwidth for the purpose of reselling to the websites of third parties. Sometimes, a reseller can take a dedicated server from a hosting company (Linux or Windows) on rent and further let it out to third parties.
Most website users either are with Linux or Windows. This has got to do with the uptime. Both platforms ensure that your website is up 99% of the time.
1. Customization
One of the main differences between a Linux Reseller Hostingplan and the one provided by Windows is about customization. While you can experiment with both the players in several ways, Linux is way more customizable than Windows. The latter has more features than its counterpart and that is why many developers and administrators find Linux very customer- friendly.
2. Applications
Different reseller hosting services have different applications. Linux and Windows both have their own array of applications but the latter has an edge when it comes to numbers and versatility. This has got to do with the open source nature of Linux. Any developer can upload his app on the Linux platform and this makes it an attractive hosting provider to millions of website owners.
However, please note that if you are using Linux for web hosting but at the same time use the Windows OS, then some applications may not simply work.
3. Stability
While both the platforms are stable, Linux Reseller Hosting is more stable of the two. It being an open source platform, can work in several environments.This platform can be modified and developed every now and then.
4. .NET compatibility
It isn’t that Linux is superior to Windows in every possible way. When it comes to .NET compatibility, Windows steals the limelight. Web applications can be easily developed on a Windows hosting platform.
5. Cost advantages
Both the hosting platforms are affordable. But if you are feeling a cash crunch, then you should opt for Linux. It is free and that is why it is opted by so many developers and system administrators all around the world.
6. Ease of setup
Windows is easier to set up than its counterpart. All things said and done, Windows still retains its user-friendliness all these years.
7. Security
Opt for Linux reseller hosting because it is more secure than Windows. This holds true especially for people running their E-commerce businesses.
Conclusion
Choosing between the two will depend on your requirement and the cost flexibility. Both the hosting services have unique advantages. While Windows is easy to set up, Linux is cost effective, secure and is more versatile.

Back in March of this year, I had a very bad experience with a media company refusing to pay me and answer my emails. They still owe me thousands of dollars and the feeling of rage I have permeates everyday. Turns out I am not alone though, and hundreds of other website owners are in the same boat. It"s sort of par for the course with digital advertising.
In all honesty, I"ve had this blog for a long time and I have bounced around different ad networks in the past. After removing the ad units from that company who stiffed me, I was back to square one. I should also note that I never quite liked Googles AdSense product, only because it feels like the "bottom of the barrel" of display ads. Not from a quality perspective, but from a revenue one.
From what I understand, you want Google advertising on your site, but you also want other big companies and agencies doing it as well. That way you maximize the demand and revenue.
After my negative experience I got recommend a company called Newor Media . And if I"m honest I wasn"t sold at first mostly because I couldn"t find much information on them. I did find a couple decent reviews on other sites, and after talking to someone there, I decided to give it a try. I will say that they are SUPER helpful. Every network I have ever worked with has been pretty short with me in terms of answers and getting going. They answered every question and it was a really encouraging process.
I"ve been running the ads for a few months and the earnings are about in line with what I was making with the other company. So I can"t really say if they are that much better than others, but where they do stand out is a point that I really want to make. The communication with them is unlike any other network I"ve ever worked it. Here is a case where they really are different:
They pushed the first payment to me on time with Paypal. But because I"m not in the U.S (and this happens for everyone I think), I got a fee taken out from Paypal. I emailed my representative about it, asking if there was a way to avoid that in the future.
They said that they couldn"t avoid the fee, but that they would REIMBURSE ALL FEES.... INCLUDING THE MOST RECENT PAYMENT! Not only that, but the reimbursement payment was received within 10 MINUTES! When have you ever been able to make a request like that without having to be forwarded to the "finance department" to then never be responded to.
The bottom line is that I love this company. I might be able to make more somewhere else, I"m not really sure, but they have a publisher for life with me. I"m not a huge site and I don"t generate a ton of income, but I feel like a very important client when I talk to them. It"s genuinely a breathe of fresh air in an industry that is ripe with fraud and non-responsiveness.
Microcomputers that have been created by the Raspberry Pi Foundation in 2012 have been hugely successful in sparking levels of creativity in young children and this UK based company began offering learn-to-code startup programs like pi-top an Kano. There is now a new startup that is making use of Pi electronics, and the device is known as Pip, a handheld console that offers a touchscreen, multiple ports, control buttons and speakers. The idea behind the device is to engage younger individuals with a game device that is retro but will also offer a code learning experience through a web based platform.

The amazing software platform being offered with Pip will offer the chance to begin coding in Python, HTML/CSS, JavaScript, Lua and PHP. The device offers step-by-step tutorials to get children started with coding and allows them to even make LEDs flash. While Pip is still a prototype, it will surely be a huge hit in the industry and will engage children who have an interest in coding and will provide them the education and resources needed to begin coding at a young age.
Future of Coding
Coding has a great future, and even if children will not be using coding as a career, they can benefit from learning how to code with this new device that makes it easier than ever. With Pip, even the youngest coding enthusiasts will learn different languages and will be well on their way to creating their own codes, own games, own apps and more. It is the future of the electronic era and Pip allows the basic building blocks of coding to be mastered.Computer science has become an important part of education and with devices like the new Pip , children can start to enhance their education at home while having fun. Coding goes far beyond simply creating websites or software. It can be used to enhance safety in a city, to help with research in the medical field and much more. Since we now live in a world that is dominated by software, coding is the future and it is important for all children to at least have a basic understanding of how it works, even if they never make use of these skills as a career. In terms of the future, coding will be a critical component of daily life. It will be the language of the world and not knowing computers or how they work can pose challenges that are just as difficult to overcome as illiteracy.
Coding will also provide major changes in the gaming world, especially when it comes to online gaming, including the access of online casinos. To see just how coding has already enhanced the gaming world, take a look at a few top rated casino sites that rely on coding. Take a quick peek to check it out and see just how coding can present realistic environments online.
How Pip Engages Children
When it comes to the opportunity to learn coding, children have many options. There are a number of devices and hardware gizmos that can be purchased, but Pip takes a different approach with their device. The portability of the device and the touchscreen offer an advantage to other coding devices that are on the market. Pip will be fully compatible with electronic components in addition to the Raspberry Pi HAT system. The device uses standard languages and has basic tools and is a perfect device for any beginner coder. The goal is to remove any barriers between an idea and creation and make tools immediately available for use. One of the other great advantages of Pip is that it uses a SD card, so it can be used as a desktop computer as well when it is connected to a monitor and mouse.The Pip device would help kids and interested coder novice with an enthusiasm into learning and practicing coding. By offering a combination of task completion and tinkering to solve problems, the device will certainly engage the younger generation. The device then allows these young coders to move to more advanced levels of coding in different languages like JavaScript and HTML/CSS. Since the device replicates a gaming console, it will immediately capture the attention of children and will engage them to learn about coding at a young age. It also comes with some preloaded games to retain attention, such as Pac-Man and Minecraft.
Innovations to Come
Future innovation largely depends on a child’s current ability to code and their overall understanding of the process. As children learn to code at an early age by using such devices as the new Pip, they will gain the skills and knowledge to create amazing things in the future. This could be the introduction of new games or apps or even ideas that can come to life to help with medical research and treatments. There are endless possibilities. Since our future will be controlled by software and computers, starting young is the best way to go, which is why the new Pip is geared towards the young crowd. By offering a console device that can play games while teaching coding skills, young members of society are well on their way to being the creators of software in the future that will change all our lives. This is just the beginning, but it is something that millions of children all over the world are starting to learn and master. With the use of devices like Pip, coding basics are covered and children will quickly learn the different coding languages that can lead down amazing paths as they enter adulthood.Одно из главнейших достоинств PHP - то, как он работает с формами HTML. Здесь основным является то, что каждый элемент формы автоматически становится доступным вашим программам на PHP. Для подробной информации об использовании форм в PHP читайте раздел . Вот пример формы HTML:
Пример #1 Простейшая форма HTML
В этой форме нет ничего особенного. Это обычная форма HTML без каких-либо специальных тегов. Когда пользователь заполнит форму и нажмет кнопку отправки, будет вызвана страница action.php . В этом файле может быть что-то вроде:
Пример #2 Выводим данные формы
Здравствуйте,
.
Вам
лет.
Пример вывода данной программы:
Здравствуйте, Сергей. Вам 30 лет.
Если не принимать во внимание куски кода с htmlspecialchars() и (int) , принцип работы данного кода должен быть прост и понятен. htmlspecialchars() обеспечивает правильную кодировку "особых" HTML-символов так, чтобы вредоносный HTML или Javascript не был вставлен на вашу страницу. Поле age, о котором нам известно, что оно должно быть число, мы можем просто преобразовать в integer , что автоматически избавит нас от нежелательных символов. PHP также может сделать это автоматически с помощью расширения filter . Переменные $_POST["name"] и $_POST["age"] автоматически установлены для вас средствами PHP. Ранее мы использовали суперглобальную переменную $_SERVER , здесь же мы точно так же используем суперглобальную переменную $_POST , которая содержит все POST-данные. Заметим, что метод отправки (method) нашей формы - POST. Если бы мы использовали метод GET , то информация нашей формы была бы в суперглобальной переменной $_GET . Кроме этого, можно использовать переменную $_REQUEST , если источник данных не имеет значения. Эта переменная содержит смесь данных GET, POST, COOKIE.
16 years ago
According to the HTTP specification, you should use the POST method when you"re using the form to change the state of something on the server end. For example, if a page has a form to allow users to add their own comments, like this page here, the form should use POST. If you click "Reload" or "Refresh" on a page that you reached through a POST, it"s almost always an error -- you shouldn"t be posting the same comment twice -- which is why these pages aren"t bookmarked or cached.
You should use the GET method when your form is, well, getting something off the server and not actually changing anything. For example, the form for a search engine should use GET, since searching a Web site should not be changing anything that the client might care about, and bookmarking or caching the results of a search-engine query is just as useful as bookmarking or caching a static HTML page.
2 years ago
Worth clarifying:
POST is not more secure than GET.
The reasons for choosing GET vs POST involve various factors such as intent of the request (are you "submitting" information?), the size of the request (there are limits to how long a URL can be, and GET parameters are sent in the URL), and how easily you want the Action to be shareable -- Example, Google Searches are GET because it makes it easy to copy and share the search query with someone else simply by sharing the URL.
Security is only a consideration here due to the fact that a GET is easier to share than a POST. Example: you don"t want a password to be sent by GET, because the user might share the resulting URL and inadvertently expose their password.
However, a GET and a POST are equally easy to intercept by a well-placed malicious person if you don"t deploy TLS/SSL to protect the network connection itself.
All Forms sent over HTTP (usually port 80) are insecure, and today (2017), there aren"t many good reasons for a public website to not be using HTTPS (which is basically HTTP + Transport Layer Security).
As a bonus, if you use TLS you minimise the risk of your users getting code (ADs) injected into your traffic that wasn"t put there by you.
Last modified on July 23rd, 2019 by Vincy.
User registration or sign up is an integral part of many web applications and it is critical to get it right for the success of the application. It is the starting point of user engagement with your application.
It should be as simple as possible with best UI / UX. Implementing user registration functionality using PHP is a simple task and I will walk you through the steps with example in this article.
What is inside?
How this PHP user registration example works?
This example code can be separated into 3 parts.
- Getting user information via a HTML form.
- Validating user submitted information on form submit.
- Database handling to save registered user to the database after validation.
The third step will be executed after ensuring that the user is not added already. This data uniqueness validation will be performed based on their email and username entered by them.
During registration we generally collect user information, who are ready to register with our application. Some of them will be mandatory and some of them will be optional.
So, this functionality may also include validation part to ensure about the non-emptiness and the format of the user data. The validation could be done either in client-side or server side.
Having validation at server-side is always better. You can choose to have it in client-side also for the ease of use of the users. But having at the server-side is not optional and a minimum requirement.
File structure
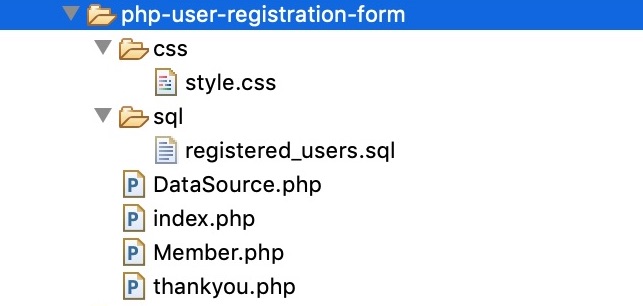
HTML form to allow user to register
In this example, the registration form contains the fields Username, Name(Display Name), Password and Email. It also has the Confirm Password field to let the user to reenter his password for the confirmation. These two passwords will be compared later at the time of a .
By submitting this form, the user is expected to agree the terms and conditions. So a checkbox field is added before the Register button for ensuring it.
And the styles are,
Body { font-family: Arial; color: #333; font-size: 0.95em; } .form-head { color: #191919; font-weight: normal; font-weight: 400; margin: 0; text-align: center; font-size: 1.8em; } .error-message { padding: 7px 10px; background: #fff1f2; border: #ffd5da 1px solid; color: #d6001c; border-radius: 4px; margin: 30px 0px 10px 0px; } .success-message { padding: 7px 10px; background: #cae0c4; border: #c3d0b5 1px solid; color: #027506; border-radius: 4px; margin: 30px 0px 10px 0px; } .demo-table { background: #ffffff; border-spacing: initial; margin: 15px auto; word-break: break-word; table-layout: auto; line-height: 1.8em; color: #333; border-radius: 4px; padding: 20px 40px; width: 380px; border: 1px solid; border-color: #e5e6e9 #dfe0e4 #d0d1d5; } .demo-table .label { color: #888888; } .demo-table .field-column { padding: 15px 0px; } .demo-input-box { padding: 13px; border: #CCC 1px solid; border-radius: 4px; width: 100%; } .btnRegister { padding: 13px; background-color: #5d9cec; color: #f5f7fa; cursor: pointer; border-radius: 4px; width: 100%; border: #5791da 1px solid; font-size: 1.1em; } .response-text { max-width: 380px; font-size: 1.5em; text-align: center; background: #fff3de; padding: 42px; border-radius: 3px; border: #f5e9d4 1px solid; font-family: arial; line-height: 34px; margin: 15px auto; } .terms { margin-bottom: 5px; }
How to validate user information on form submit
A server-side form validation script is added in this example for validating the user registration data. This PHP validation script will be called on submitting the registration form.
This script validates all form fields to check the non-emptiness for each field. Then it validates the user email format using PHP filter_var() function.
As the registration includes password confirmation feature, the password comparison will take place at this part of this example.
Finally, the validation script will check if the user accepts term and condition by checking the appropriate box on the form.
Once all the validation completed by returning boolean true, then the actual registration process will take place.
Function validateMember() { $valid = true; $errorMessage = array(); foreach ($_POST as $key => $value) { if (empty($_POST[$key])) { $valid = false; } } if($valid == true) { if ($_POST["password"] != $_POST["confirm_password"]) { $errorMessage = "Passwords should be same."; $valid = false; } if (! isset($error_message)) { if (! filter_var($_POST["userEmail"], FILTER_VALIDATE_EMAIL)) { $errorMessage = "Invalid email address."; $valid = false; } } if (! isset($error_message)) { if (! isset($_POST["terms"])) { $errorMessage = "Accept terms and conditions."; $valid = false; } } } else { $errorMessage = "All fields are required."; } if ($valid == false) { return $errorMessage; } return; }
PHP MySQL code to access database to save registered user
Server-side user form validation
This is the PHP entry point to handle all the server-side script to validate form and to handle database operations based on the validation result.
validateMember($username, $displayName, $password, $email); if (empty($errorMessage)) { $memberCount = $member->isMemberExists($username, $email); if ($memberCount == 0) { $insertId = $member->insertMemberRecord($username, $displayName, $password, $email); if (! empty($insertId)) { header("Location: thankyou.php"); } } else { $errorMessage = "User already exists."; } } } ?>
Check if user already exists
The isMemberExists() function is used to check the user data uniqueness based on their email and the username. If the entered username or email there exists in the user database, then the registration process will be stopped by returning and acknowledgement.
This acknowledgement will notify that the “user already exists”. The code is,
Function isMemberExists($username, $email) { $query = "select * FROM registered_users WHERE user_name = ? OR email = ?"; $paramType = "ss"; $paramArray = array($username, $email); $memberCount = $this->ds->numRows($query, $paramType, $paramArray); return $memberCount; }
Insert member data to the database
If it returns 0 then it means that there is no such users exist with the email or the username entered. And so, the registration data will be inserted to the database. The following code shows the member insert method.
Function insertMemberRecord($username, $displayName, $password, $email) { $passwordHash = md5($password); $query = "INSERT INTO registered_users (user_name, display_name, password, email) VALUES (?, ?, ?, ?)"; $paramType = "ssss"; $paramArray = array($username, $displayName, $passwordHash, $email); $insertId = $this->ds->insert($query, $paramType, $paramArray); return $insertId; }
DataSource.php
This is the generic data source class in PHP to perform database operations. It includes functions to connect database and execute various queries to get database result, row count, execute insert and more.
This datasource class is generic and kept as simple as possible. It is efficient and I use it in my most of the micro projects and tutorials. You are free to download and use it.
Important thing is never forget to use the Prepared Statements . It helps you to safeguard from SQL injection attacks and it is the first step in terms of implementing security in a web application.
conn = $this->getConnection(); } /** * If connection object is needed use this method and get access to it. * Otherwise, use the below methods for insert / update / etc. * * @return \mysqli */ public function getConnection() { $conn = new \mysqli(self::HOST, self::USERNAME, self::PASSWORD, self::DATABASENAME); if (mysqli_connect_errno()) { trigger_error("Problem with connecting to database."); } $conn->set_charset("utf8"); return $conn; } /** * To get database results * @param string $query * @param string $paramType * @param array $paramArray * @return array */ public function select($query, $paramType="", $paramArray=array()) { $stmt = $this->conn->prepare($query); if(!empty($paramType) && !empty($paramArray)) { $this->bindQueryParams($sql, $paramType, $paramArray); } $stmt->execute(); $result = $stmt->get_result(); if ($result->num_rows > 0) { while ($row = $result->fetch_assoc()) { $resultset = $row; } } if (! empty($resultset)) { return $resultset; } } /** * To insert * @param string $query * @param string $paramType * @param array $paramArray * @return int */ public function insert($query, $paramType, $paramArray) { print $query; $stmt = $this->conn->prepare($query); $this->bindQueryParams($stmt, $paramType, $paramArray); $stmt->execute(); $insertId = $stmt->insert_id; return $insertId; } /** * To execute query * @param string $query * @param string $paramType * @param array $paramArray */ public function execute($query, $paramType="", $paramArray=array()) { $stmt = $this->conn->prepare($query); if(!empty($paramType) && !empty($paramArray)) { $this->bindQueryParams($stmt, $paramType="", $paramArray=array()); } $stmt->execute(); } /** * 1. Prepares parameter binding * 2. Bind prameters to the sql statement * @param string $stmt * @param string $paramType * @param array $paramArray */ public function bindQueryParams($stmt, $paramType, $paramArray=array()) { $paramValueReference = & $paramType; for ($i = 0; $i < count($paramArray); $i ++) { $paramValueReference = & $paramArray[$i]; } call_user_func_array(array($stmt, "bind_param"), $paramValueReference); } /** * To get database results * @param string $query * @param string $paramType * @param array $paramArray * @return array */ public function numRows($query, $paramType="", $paramArray=array()) { $stmt = $this->conn->prepare($query); if(!empty($paramType) && !empty($paramArray)) { $this->bindQueryParams($stmt, $paramType, $paramArray); } $stmt->execute(); $stmt->store_result(); $recordCount = $stmt->num_rows; return $recordCount; } }
Database script
This database script has the create statement for the registered_users table. Import this script in your development environment to run this code.
Table structure for table `registered_users` -- CREATE TABLE IF NOT EXISTS `registered_users` (`id` int(8) NOT NULL AUTO_INCREMENT, `user_name` varchar(255) NOT NULL, `first_name` varchar(255) NOT NULL, `last_name` varchar(255) NOT NULL, `password` varchar(25) NOT NULL, `email` varchar(55) NOT NULL, `gender` varchar(20) NOT NULL, PRIMARY KEY (`id`));
If the registration form validation fails, then the error message will be shown to the user as like as below.

Comments to “PHP User Registration Form (Sign up) with MySQL Database”
Hi Vincy, I get the following errors when running the register code, please help.
INSERT INTO registered_users (user_name, display_name, password, email) VALUES (?, ?, ?, ?)
Warning: call_user_func_array() expects parameter 1 to be a valid callback, first array member is not a valid class name or object in C:\xampp\htdocs\PHP\JAMII-CASH\DataSource.php on line 136
Fatal error: Uncaught Error: Call to a member function execute() on boolean in C:\xampp\htdocs\PHP\JAMII-CASH\DataSource.php:99 Stack trace: #0 C:\xampp\htdocs\PHP\JAMII-CASH\Member.php(83): Phppot\DataSource->insert(‘INSERT INTO reg…’, ‘ssss’, Array) #1 C:\xampp\htdocs\PHP\JAMII-CASH\index.php(20): Phppot\Member->insertMemberRecord(‘chuki10’, ‘Ray’, ‘202020’, ‘raf.yah.s.1@gma…’) #2 {main} thrown in C:\xampp\htdocs\PHP\JAMII-CASH\DataSource.php on line 99


